Learning Javascript

Over the past week I’ve been working through a Lynda tutorial on Javascript basics, I think I’ve got a good hold on the language and will be starting work on the site while I finish up this course and Jquery. Here are the notes:

Javascript Lynda Notes

Programming language that is intentionally limited (cannot save/load local files), so often considered not a scripting language.

It was designed to manipulate web pages, running client-side. Unlike languages like PHP.

Does not need to be compiled, and is CASE SENSITIVE.

Javascript can be disabled client side, so make sure your site still works without it.

Adding Javascript

<script>script here</script>

e.g. <script> alert(“hello world!”);</script>

Software for Java

Recommended: Get a version of every browser

Firefox has great debugging tools, also install the Firebug extension to allow direct experimentation in the browser.

Starting

End every statement with a semi-colon, does’t need to be on different lines but its good practice.

Put Javascript at the end of a html file so that the javascript is loaded after the HTML is.

Java doesn’t care about spaces.

Comments

//everything after a double forward slash on a line is a comment, can be put after code as well.

/* for multiple lines a fowardslash star can
be used, ending with the reverse. */

Where to write Javascript

The <script> element is good for a few unique pages (i.e. inline javascript).

Using a separate .js file is best for larger amounts of code.
To link an external script use:
<script src=“my script.js”></script>
Src = source

Legacy browsers had type=“text/javascript”> after the quotation marks but that isn’t necessary with HTML 5.

Usually, put the script tag at the end of the HTML page, just before the </body> tag.

Variables

var points to a variable, the name of the variable comes after var. The name cannot include spaces and cannot start with a number (but can include numbers).

var nameofvariable;

This creates the variable, but does not have a value (i.e. an undefined variable.

Adding values can be done like this

nameofvariable = 1009;
or: var nameofvariable = 1009; to add the variable and value.

On the 2nd example, var isn’t necessary, but it is good practice to always add as it can break your code in some situations if you don’t.

Variable names are case sensitive.

To create multiple variables write:

var year, month, day; and to add multiple values as well write:
var year = 2017, month = 2, day = 6;

Variables are generic, and don’t have different types like other languages.
Can use double and single quotes, but not interchangeably (stick to one type).

Conditional Code

if (condition) {
code to run if condition is true.
}

To check equality use two =
(Triple equals sign works)

i.e.:
if ( c == 99 ) {
code
}

To check for not equal numbers type !=

To make it execute code of the statement is false use:

if ( c != 100 ) {
alert (“not 100”);
} else {
alert (“is 100):
}

Operators

Arithmetic operators
+-*/

= : Assigns value to a number (only 1 equals)

Adding to a variable:

Score = score + 10

Adds 10 to the value of score and reassigns that number to score. Shorthand you can write:

score += 10
score -= 10
score *= 10
score /= 10

It works on BIDMAS

= Assign
== Equality
=== Strict equality
!== not strictly equal to
!= not equal to
>= greater than or equal to
> greater than

If a value is stored as a value, and another is stored as a string (with “quotations”), even if its the same number the triple equal sign will say they aren’t equal, whereas the double will.
(ie. triple equal sign checks the syntax in the code)

Most of the time

And/Or Operators

if (a === b && c === d {….
asks if a=b AND c = d

if ((a === b) || (c === d) {….
Asks if A=B OR C=D

Modulus Operators
% asks to divide but take the remainder
IE.
var year = 2003;
var remainder = year % 4;

This divides 2003 by 4 and checks the remainder instead of the result (4*500= 2000 with a remainder of 3)

Incremental addition Operators

If you just want to add 1 to a variable use:

a++;
++a
a = a + 1;
a += 1;

Minus, use:
a—:
—a:

Can be used before or after the variable (a), however, it will still execute code in order. i.e..
alert(a++); displays value of A but doesn’t add 1 on until after it is shown.

Ternary Operators

condition ? true : false

var playerOne = 500;
var playerTwo = 600;

To check which one is higher and return the value of that one use:

var highScore = (playerOne > playerTwo) ? playerOne : playerTwo

i.e. condition = playerOne > playerTwo
if true (true first) return playerOne value
if false (after colon) return the value of playerTwo

Firebug feature

Replace Alert with console.log to stop constant alerts coming up. It’ll only work in debuggers with that code added, it isn’t official javascript.

Working with loops (iteration)

var a = 1;
while ( a < 10 ) {
console.log(a);
a++
}

Create variable A with a value of 1, check the value and if it is less than 10 log the number in the console then add 1.
Without the a++ it would be an infinite loop.

do {
console.log(a);
a++
} while ( a < 10);

This is less common, the difference is this code will always run once then check the condition.

for ( var i = 1 ‘ i < 10 ; i++ ) {
//code
}

Just a shorthand way to do it, creates variable i with value 1, checks if its less than 10, adds 1 to it then runs the code if its less than 10.

Break

for (var i = 1 : i < 5000 ; i++) {
//code
if (i==101) {{
break:
}
//code
}

Loops the code, adding 1 to i until i = 101, then running ‘break;’ which skips out of the conditional statement.

Continue

Replace break; with continue; to instead of breaking away from the condition, finish this loop and return to the start of the statement.

Adding Functions

function functionName () {
//function code
}

Functions do not automatically run. To run it, put:

functionName();

Anywhere in the code. You should define your functions before you call them, but you don’t have to.

To create functions that expect to be passed information:

function functionName ( x,y ) {
var myVar = x + Y
}

Now when calling the function, typing:

functionName ( 4,8);

will use 4 as x and 8 as y, adding them together.
To return a value, use:

return myVar;

It will be ignored if you don’t use it, such as with:

var myResult = functionName ( 4,8 );

This would run the function, then any value returned would be added to myResult value.

Creating a variable inside a function does not create the variable outside the function.

Creating Arrays

Created much like variables, but arrays have more than 1 value.

var arrayName = [];
The [] indicates its an array, you can add multiple values with:

arrayName[0] = 50;
arrayName[1] = 60;
arrayName[2] = 65;
arrayName[3] = mouse;

To use the values:
console.log(arrayName[3]); prints ‘mouse’ in the console

Shorthand:
var arrayName = [ 50,60,65,mouse];

This adds variables in order, starting from 0, adding as many as you’d need. Other ways that work creating arrays are:

var arrayName = new Array ();
var arrayName = Array ();

The Array is an ‘object’ so it can be used these ways.
To add a size to the array, use:

var arrayName = Array (5);

Creates an array with 5 slots, but this isn’t needed as all arrays are dynamic.

Array Properties

console.log(arrayName.length);
Shows the amount of slots used in an array.

Array Methods

A method is a function that belongs to an object, as arrays are objects these can be used.

someObject.someMethod(): to call a method. i.e:

var arrayName = [50,60,65,mouse];
var reversedArray = arrayName.reverse();

This creates another array with the values reversed.
others include:
.join();
.sort();

console.log(reversedArray.join());
This will print out ‘mouse,65,60,50’ to the console log.

Working with numbers

All Javascript numbers are 64-bit floating point numbers.
Adding numbers as variables with quotations adds it as a string. Adding strings together won’t add the numbers together, but combine the strings. (‘5’ + ‘5’ = ’55’, 5 + 5 = 10)

To check if a string is a number, use:
var myNumber = Number (variableName);

if (!isNaN(myNumber) ) {
console.log(“it is a number”);
}

This creates a variable called myNumber, if variableName is not a number (checked with = Number) it will return with NaN, which is added to the myNumber variable.

The 2nd half checks if myNumber does not (with !) = NaN, and if it isn’t, it should be a number, so the console prints “it is a number”)

Using the Math Object

var x = 200.6;
var y = Math.round(x);

This adds variable y which is a rounded version of x
Others include;

Math.max which picks the largest of a series of numbers
Math.max which does the opposite
Math.PI
Math.random
Math.sqrt
Math.log

Working With Strings

Using quotes inside of quotes
Use quotes around a string, can be ‘ or “ but not both, if using quotations in the string you can’t use the one you put around the string.
Unless you use \ e.g:
var phrase = “He said \ that’s fine,\” and left.”;

String Properties
var phrase = “phase goes here”;
console.log(phrase.length); To check the length of a string and print it.
phrase.toUpperCase(); changes all characters to uppercase.
phrase.toLowerCase();
phrase.split(“ “) creates an array from the string, using spaces to split the string up as a space is in the quotations, this can be changed to anything.
var position phrase.indexOf(“goes”) checks for how far in the string a phrase is, gives the amount of characters that appear before the phrase. Returns -1 if the string is not found.
phrase.lastindexof() finds the last phrase in the string.
var segment = phrase.slice(6,10); takes from character 6 to 10 and outputs it to variable segment. (i.e: goes)
.substring () works the same as slice
.substr() is similar but the 2nd number is the length of the segment rather than the end character.

if ( str1.toLowerCase() == str2.toLowerCase() ) {
console.log(“Yes, equal”);
}
Good for comparing strings without being case sensitive.
Remember using < or > that capitals are worth less than lower case.

Working with dates
var today = new Date (); prints current date and time.
var y2k = new Date (2000,0,1); prints year 2000, current month, then day 1(goes on to minutes, then seconds);

today.getMonth();  shows month, 0-11
today.getFullYear(); shows year
today.getDate(); shows date, 1 – 31
today.getDay(); shows day of the week, 0 – 6
today.getHours(); shows hour of day 0 – 23
today.getTime(); shows time in milliseconds since 1/1/1970
today.setMonth(5); sets the month to 5
today.setFullYear(2012) sets the year to 2012
today.setDay (0); sets the day to 0

if (date.getTime() == date2.getTime() ) {
to check if dates are equal, as not using getTime always returns as false.

Objects in Javascript
An object is a container, gathering together variables and functions.

var playerName = “Fred”;
var playerScore = 10000:
var playerRank = 1;
This creates separate variables, but can be joined together with an object:
var player = new Object();
player.Name = “Fred”;
player.Score = 10000:
player.Rank = 1;
This creates an object called player, and adds properties called Name, Score and Rank

var player1 = { name:”Fred”, score: 10000, rank: 1 };
var player2 = { name:”John”, score: 5000, rank: 3 };
is the shorthand way of creating it.

console.log(player1.name); prints ‘Fred’

function playerDetails(){
//code
}
Creates a function called playerDetails

player1.logDetails = playerDetails;
This assigns a method to the object, which is the function playerDetails.

function playerDetails(){
console.log(this.name + “has a rank of “ +
this.rank “ and a score of “ + this.score);
}

Adding this to a method will pull the object the method is assigned to, so if you use:
player1.logDetails(); it will print the name, score and rank of player 1 after logDetails was assigned to playerDetails the () after logDetails tells it you want to call that variable/property.

What is the DOM – Document object model

The document objects model is terminology to help javascript work with HTML/CSS. It is structured using nodes, and where they are nested.

<ul id=“optionList”>
<li>first</li>
<li>second</li>
<li>third</li>
</ul>
The whole piece of code is considered an element node.
As it has been tagged it is also an attribute node.
The <li> inside the list is considered another element node
The text inside the <li> elements is a text node.

Element nodes do not contain the text inside the element.

How to get an element node

var myElement = document.getElementById(“abc”)
creates an element called myElement and adds the element with the Id of ‘abc’ to the variable.

document.getElementsByTagName(“a”)
Will get all elements that are anchor <a> elements, creates an array with each anchor included. If it can’t find the elements it will create the array but not add anything.
var mainTitle = document.getElementById(“mainTitile”);
mainTitle.nodeType Checks the type the node is, outputting 1,2 or 3 for elements, attributes and text.
mainTitle.innerHTML shows the html written inside the element
mainTitle.childNodes shows the amount of child nodes are inside the element.

var newList = oldList.getElementsByTagName(“a”)
Creates a new array of all anchor elements inside variable oldList, which can be created like any other variable.

Changing DOM Elements

myElement.getAttribute(“align”); will fetch the align attribute of myElement, align can be replaced with any attribute.
myElement.getAttribute(“align, right”); sets the alignment of myElement to the right.
If the attribute doesn’t exist it will be created.

Creating DOM Content
1. Create the element
2. Add it to the document

var myNewElement = document.createElement(“li”);
will create the <li> tag
myElement.appendChild(myNewElement);
will find the myElement variable and add the <li> element to it. (if var myElement = document.getElementById(“abc”) is written earlier it will add a <li> nested inside the element tagged ‘abc’)
var myNewElement = innerHTML(“new item text”);
is one way to add text to myNewElement.

Creating Text Nodes
var myText = document.createTextNode(“text”);
myNewElement.appendChild(myText);
Is a better, more exact way to do it.
Designing a logo

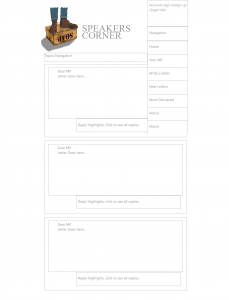
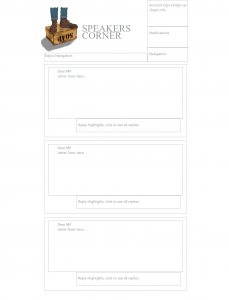
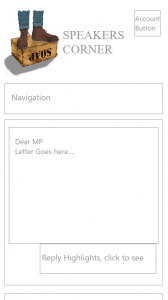
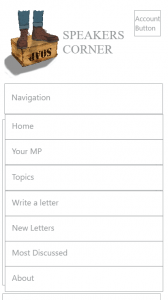
I went about designing a logo for the site, I wanted to use a soapbox as the logo to pay homage to the origional speakers corner, I’m worried it might send the wrong message though, so I’ll have to look into designing other logos.

The logo was designed with photoshop and a graphics tablet so I feel it gives the impresion of a drawing rather than a logo, as logos are more minimalistic and utilitarian.

AI box logo Logo halfdone 1 Logo halfdone 2 Logo

Further Notes

I finished the HTML 5 course and have briefly refreshed myself on CSS, here are my notes:

HTML NOTES

<small> is for small print, not for making small text
<mark> is for emphasis on content that originally wasn’t there (e.g. highlight a part of a quote that wasn’t originally in the quote)

Working with Date & Time

<time> is for any date or time, but it must be in a machine readable format
Valid strings can be found in the specification and can be added in the datetime attribute if it isn’t in a readable format;
<time datetime”year-month-date”>Written date for content</time>
<time date time”2017-2-4T23:59:59-00:00”> The T is to tell the browser the format has switched from date to time, the 0:00 at the end is the UTC offset for time differences (UK’s is 00:00).

Linking and the rel attribute

can be used by <a> <area> <anchor> and <link> elements to bring in external resources.
It is used in links to tell a browser/search engine what the purpose of a link is.

<ling href=“_css/main.css” media=“screen” rel=“stylesheet”> tells the browser this link is for a stylesheet. More can be found on the specification.

“nofollow” is good for stopping search engines associating the linked page with your own.
add more values with a space between them, inside the quotation marks.

More can be found in the spec

Comments

<!—— comment here, gets disregarded ——>

Meta Tags
Content attributes
charset=“utf-8” is a metatag that should always be in
http-equiv the old way to encode documents(replaced by charset)
name for adding name-value pairs
content tag used below

<meta name=“description” content=“description goes here”>
<meta name=“something from below” content=“value of the metatag”>

author to credit the page’s author
description Good idea to add, some search engines use the description to display in results
keywords Useless now as it was abused in the early days.
(can be found in spec)

You can add any metatags you want, people use viewport as a name value.
Social media uses metatags to display links

Metatag should be at the top of the page for the charset tag.

Using Classes
Zurb’s Foundation 5 is a tool to add classes to HTML 5, opens up a large framework of classes.

Classes are good for styling, but as ID’s can only be used once per page, the id=“tag” is good to add semantic value by describing each unique piece of content
<header id=“mainheader”>

While ID’s can only be used once, the class tag can be used multiple times (e.g. <span class=“author”>author</span>

ARIA landmark roles
Good for screenreader and other assistive software.
<role> can be assigned to any html element to assign it a role, these can be found in the spec.

Landmark roles are the important part for assistive tech, theres only a few.
Using WAI-ARIA in HTML is a good part of the spec, check the recommendations table.

<header id=“main header” role=“banner”> ‘banner’ is for any content to title the page, spanning it, like a header. So we attribute the banner role to the header.

role=“main” should be added to the <main> element because some software still look for the main role rather than the main element.
Micro data, micro format and RDFa

Good for adding additional semantics to HTML to identify more content. (e.g. identifying particular products)

There are 3 options, you only need 1 I think.

Schema.org
Microformats
RDFa

All are supported, schema is the most recent, microformats is the oldest and most widely used.

——————————————————————————————————————————————

CSS Lynda Notes

Css Resets: a template CSS file that resets all browser styles to default (so users can’t change the default).

CSS browser style sheets can be found at Jens Meiert’s blog ‘user agent browser sheets’.

Using Declarations
Selector {declaration}
The Selector is to target HTML Elements

The Declaration is split into property and value, split with a ; (i.e.(property:value)

div + p {font:12;colour:blue;}

This code targets any P element followed by a div element and changes font size to 12 and colour to blue (use american spelling).

A semi-colon is used to add extra declarations. End the declarations with a semi-colon as well.

Using Inline Rules
Used to group styles or style definitions together

@font-face,@media,@import and @page are some examples.

@media screen and (min-width:720px) {
h1 {font-size: 2em; color: blue:}
p {font-size: 1em; colour: black;}
}

Comments

/* comment goes here */

Good idea to look at spec:

Writing Selectors

The <style> tag allows you to write CSS in HTML.

p {color:red} changes all P element text to red.
div p { is called a descendant selector, it will only select the paragraph inside the div tag.
div p, h1 { targets the paragraph and heading inside the div tag

Appendix F. Full Property Table
On W3.org

Good to look through for what properties to use and when.

Using Values in Properties

Values can be split into Absolute values:
in = Inches
cm = Centimeters
mm = millimeters
pt = points
pc = picas

Good for printing, but online when resolutions and browsers can be different using relative units is best:

em = ems * (1em = default size, 1.5 is 50% bigger)
ex = exes * (the height of the font)
px = pixels * (varies with screen size)
gd = grids
rem = root ems * (support isn’t complete, but relative only to the root unit(<body>, <html>) not the immediate parent)
vw = viewport width
vh = viewport height
vm = viewport minimum
ch = Character

Some of these units are new and aren’t supported yet. (* for non new CSS).

The value of an em is dependant on when its used
So if an ‘em’ value is used outside a font size, it checks the calculated font size and uses that.

eg:
h1 {font-size:2em; margin-bottom: 1em}
}

This code sets the font size to twice the default(i.e. 16px default becomes 32 px), then uses the new font size to measure the margin at the bottom (it becomes 32 px).

This is applied to the h1 element only.

Using inline styles

To add a style to the <body> element write.

<body style=“font-family: Ariel; color:red”>

Same semantics just in a different place. People don’t use inline styles because it makes things more cluttered.
Make sure to add quotation marks.

Using Embedded styles

Good for small amount of styling on a few pages.
<style>Embedded style goes here, same semantics </style>

With old html, you’d have to add something like <style type…> to show its CSS, in HTML 5 that is unnecessary.

Using External Style Sheets

The best way to style a large number of pages.

<link href=“styles.css” type=“text/css” rel=“stylesheet”>

href means ‘where is this file i need to find’
type=“text/css” tells the browser what type of file it is, though it isn’t needed in HTML 5, just as legacy
rel=“stylesheet” describes the relationship to the html, in this case its a stylesheet.

or:
<style> @import url(“styles.css”)

@import must be at the top if there are any other rules.

A mountain to Learn – HTML 5 Notes

For this project I need to look at learning some Javascript and Jquery. There are some great Lynda tutorials on it however; Ray Vilabolos does a series on Angular js, however this is not a beginners course, Knowlage of Javascript and HTML 5 is required. I have some knowledge of HTML 4 but I have not looked at HTML 5, so I have been working through James Williamson’s HTML5: Structure, Syntax, and Semantics on Lynda.com. Here are some notes I’ll be applying to the project:

HTML 5 Lynda Notes

The Basics

<thisisanelement></thisistheendoftheelement>
<p> this tag is for paragraphs </p>
<blockquote> is like <p> but for quotations
<cite> is for the citation at the end of the quote

It is mportant to use correct elements for good practice, makes the website’s code easier to understand and easier to sort by search engines.
A good idea is to read the HTML 5 specification, there is an index of the elements at the end of the text.

Elements are either block or inline;
Block has each line as its own content (i.e.. a title header with the <hl> task
Inline is inside block elements, usually for text level (ie. <a>

Content Models

Content models are the categories for elements, each content model is not mutually exclusive;

Flow is for most elements and is for elements that would be included in the normal flow of the document e.g.: button, img, ect. if it fits in the body tag its probably flow content

Metadata is for setting up the documents presentation and behaviour, usually in the head of the document (e.g. title, no script), sometimes metadata can fit under the flow content model

Phrasing content is for the text and for formatting text in paragraphs (considered inline elements from html 4). All embedded content is phrasing content as well as some interactive and metadata.

Interactive content is for interactive elements (e.g.. anchor tag, button, embed)

Heading content is for the header of a section (i.e.. h1-h6)

Sectioning content creates sections in the body of the document. e.g.. the <main> element is for the main part of a single page, mostly containing the content of the page, not including things that would span multiple pages like logos or title bars

Organising sections and subsections

Headings are used to organise sections of a document effectively
EG:

<h1>this is the top title</h1>
<h2> this is a subsection below </h2>
<h3> a subsection of h2 </h3>
<h3> and another </h3>
<h2> another subsection </h2>
<h1>another title of unrelated content to the first section <h1>
<h2>subsection</h2>

this was common in html 4, with <div id=“tag”> elements to add more semantic meaning to the documents

in html 5 <article> <aside> <nav> and <section> are used to create sections much like the headers of html 4 did.

Structuring Headers
Sometimes you need something like a tagline below a header, use <h1> for the header, but using <h2> for the tagline is a bad idea as it defines a new section, instead use <heading> over both the header (with <h1> tag) and the tagline.

This isn’t needed for any heading without a tagline

Structuring Footers
<footer> elements typically contains info about its section (contact info, who wrote it, disclaimers, copywriter).

it can be structured like headers, with <h1> ect inside, footers don’t have to be at the bottom, can be used as footers of sections.

Grouping sections

<footer> <header> <article> and <main> are elements that are used to group sections together

id attributes like <div id…> can be applied to these sections, e.g. (<article id=“tag”>)

<article> is for stand-alone content, could be removed from the page and make sense still
<section> is for thematic grouping, if there is a section in an article, this element is commonly used

It is more important to be consistent than use these above elements as described.

<aside> is for related content, but not part of the main text, (e.g.: used for ads)

<header> is for headers
<footer> is for footers (e.g.. contact me)

<main> is for the main body of text, use it to help things like search engines identify which part of a document is the focus. While <article> tells a search engine there is stand alone content, <main> tells it where to look.

Proper nesting structure
after a heading (e.g.:<h3>) generally there is the content defined by things like the <p> tag. It is good practice to highlight everything under the header, and the header and place it in a section element. Then any subsections as well (including sub-headers).

Extensions to check document structure

HTML 5 Outliner for google chrome
gsnedders html 5 outliner, a site to copy code to check the outline (not a perfect outline)
Headings map for firefox

Sectioning Roots

Headings will show up in the headings map if not nested inside a sectioning root element.
<blockquote> <body> <fieldset> <figure> and <td> are all forms of sectioning roots. You can nest headings inside a section root to remove headings from the regular document outline.

This is good practice for navigation and search engines. Keep the correct headings as google still indexes the internal structure.

Defining HTML 5 Documents

Firstly create a doctype declaration, to tell the browser the code is in HTML 5, this has been simplified for html 5 to this:

<!doctype html>

This is all you need as HTML 5 is assumed to be used, the <doctype> tag is only really for backward compatibility, it’ll probably work without it

Optionally, you can add <html lang=“en”> to say the code is in english and in html 5, </html> is needed at the end

<head> is for metadata </head> content that is not displayed
<meta charset=“utf-8”> is an example of what would be included in the <head> section, it says what character set is used.

Example:

<!doctype html>
<html lang=“en”>
<head>
<meta charset=“utf-8”>
<title> the browser tab title goes here</title>
</head>
<body>
//main document code goes here
</body>
</html>

Supporting legacy browsers (Backward compatibility)

to add compatibility for any internet explorer below IE9, you have to add the following in the <head>

<script src=“html5shim.googlecode.com/svn/trunk/html5.js”></script>

This contacts googles servers and pulls a small piece of javascript that allows HTML 5 elements to be read by older internet explorer versions

However, the element makes every browser read the script, when it is only needed by IE, to stop this add:
<!—[if  lt IT 9]><script…….></script><![endif]—>
note: the ‘lt’ in the if statement means ‘less than’

Browsers will think off the above as a comment, unless its less than internet explorer version 9

Organising Content (for good practice)

Tutorial recommends dumping all content for a page as a list, then organise between Primary content (main focus) and secondary content.

This helps create a hierarchy, to create a document outline.

To have things
Like this subsection
and this subsection
In the correct places
To have semantic structure
for html 5
blah blah

Using Headings

<h1> is for the main header of the document, people used to say only use 1 <h1> tag, that isn’t needed now but some still do, because <h1> is commonly used as an overall page header

Don’t think of headings as big bold text, instead think of it as the identifier for which sections are main parts, sub sections, and sub sub sections.

Creating Navigation

You can put the navigation elements in the <header> or not, keep it high on the page though.

<nav> is the element used for navigation on the page </nav>

Unordered lists
in the nav element, using <ul> </ul> to identify unordered lists is a good idea, as the navigational links are generally a list of links in no particular order

Inside the unordered list tag <ul> wrap each item in a <li>list item</li> tag to identify a single item in the list.

Figure Element
<figure> elements </figure> is used to define content that illustrates the content that its related to. (eg. annotations and diagrams)

<figcaption> caption </figcaption> is not necessary but good for screen readers, format the caption with the CSS.

Keep in mind, anything considered illustrative can be contained in the <figure> element. The aim is to define the content that illustrates the main content and group all that in a meaningful way.

Using Asides
<aside> always creates a new section of content, used for sections related to content around it but could be considered separate.

Used for ads, writer reviews, tangentially related content.

Using Div tags

HTML 4 used divs much more, but they still have uses.

Div should be used as a last resort. The new html 5 elements are all round better.

Use it to group together content for javascript control or styling purposes.

E.g. at the footer, you may want 2 collums for the content, you can separate into two sections with <div class=“tag”> and using css, change the style for the tags to make each column.

Using definition Lists

<dl> definition list </dl> is for name/value pairs. So any list that organises itself with a name for a collection of values, then the values. (e.g.. a list of walks sorted by area, the name is the area, the values are the walks in that area)

<dt> definition term is for each of the names
<dd> for definitions is for each of the values.

Using tags for text style
<i> is for italics, its used for a different voice or mood than the rest of the text
<em> is for emphasis
<b> is for bold, to attract attention without conveying extra importance
<strong> is for emphasis and importance

using <p class=“tag”> is good for general styling that doesn’t fit these categories.

Good to use for html semantics.

Citing works

<cite> is good for citations

<blockquote> <q>heres an example of how to use elements for citations</q> – <footer> <cite> <span class=“author”>David Turnbull </span> – Html 5 notes <cite> 2/2/17 </footer> </blockquote>

<q> adds quotation marks
<span> is for inline elements, it doesn’t have its own styling.

Using the Address Element
<address> is used for contact information for the producer of particular content in a document (e.g.. contact info for the author of the article on a page)

Not really used for general contact info, just semantically for the author of content that is on a document. It can include more than just the contact info (like if it was part of a longer paragraph) but keep it short.

Not so much thematically important but semantically.