After a week or so of playing around with angular, watching a lynda tutorial on it, I’ve made sense of the syntax and terms and have been creating an authentication application with a lynda tutorial. Here are some notes:
Lynda Notes
Add angular with:
<html lang=”en” ng-app=”myApp”>
<script src=”js/lib/angular.min.js”></script>
<script src=”js/lib/angular-route.min.js”></script>
<script src=”js/lib/angular-animate.min.js”></script>
The rest of the applications are imported automatically.
MVC Architecture
M – Model
V – view
C – Controller
The application is split into modules, modules are for different functionality.
Routes are ways to split up your applications to different pieces, sort of like subdomains such as google images instead of google, the angular.route.min.js needs to be called or it wont work.
Instead of writing the directve:
<main class=”cf” ng-controller=”appController”>
Write:
<main class=”cf” ng-view>
To direct to the routing library, ng-view is used by the routing mechanism.
You must add the dependancies for routing:
var myApp = angular.module(‘myApp’, [‘ngRoute’]);
Dependancies in the [ ]
Injecting CSS with Angular
Angular creates classes, they can be seen via rightclick – inspect element, and these classes can be used in the CSS file to create responsive design.
in inspect element:
<input ……class=”ng-pristine ng-valid-email ng-invalid ng-invalid-required ng-touched”
Inserted into CSS:
input.ng-invalid.ng-touched {
border: 1px solid #DA3637;
}
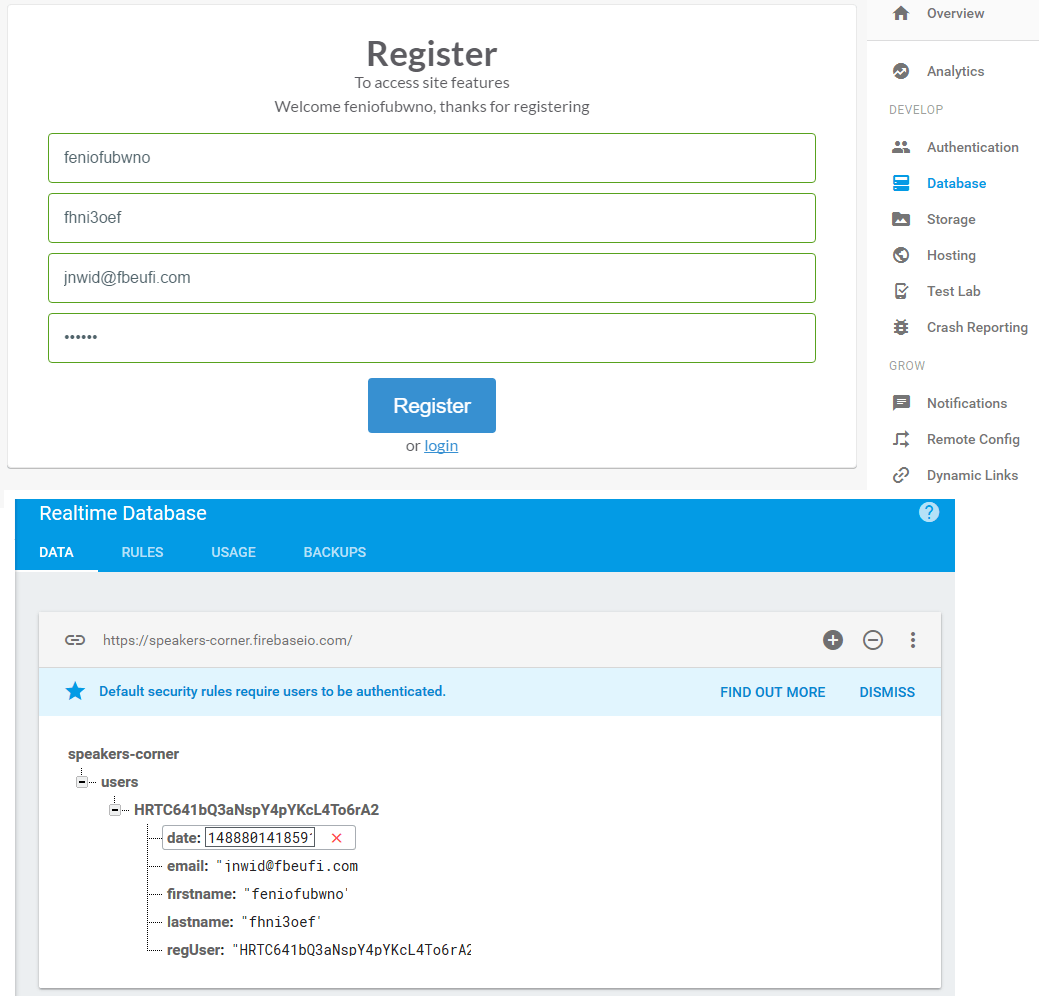
I’ve also worked out how routing works, along with creating controllers, directives and the use of $scope and {{ }}. Here is the code for my registration page:
<section class="card register">
<form name="myform"
ng-submit="register()"
novalidate> <!--novalidate takes over validation from the browser-->
<div class="textintro">
<h1>Register</h1>
<p>To access site features</p>
<p class="message" ng-show="message">{{ message }}</p>
</div>
<fieldset>
<input type="text" name="firstname" placeholder="First Name" ng-model="user.firstname" ng-required="true">
<input type="text" name="lastname" placeholder="Last Name" ng-model="user.lastname" ng-required="true">
<p class="error validationerror"
ng-show="(myform.firstname.$invalid || myform.lastname.$invalid) && myform.firstname.$touched && myform.lastname.$touched">Please enter your name</p> <!--Checks if .firstname or .lastname are .$invalid, and that both are .$tocuhed-->
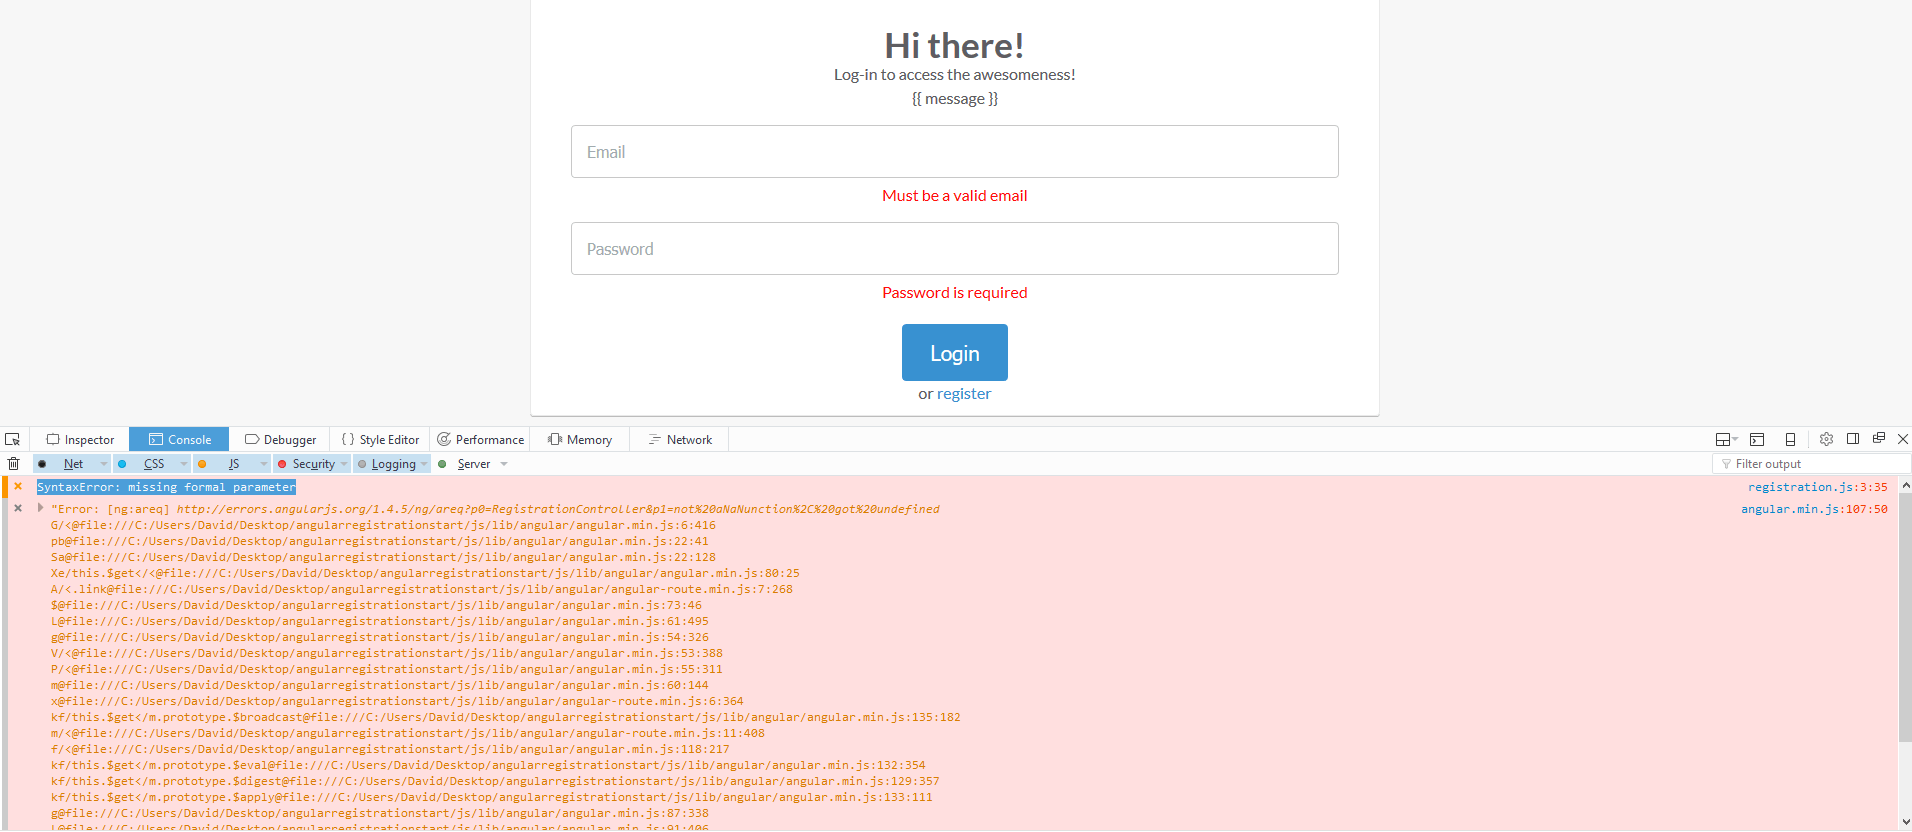
<input type="email" name="email" placeholder="Email" ng-model="user.email" ng-required="true">
<p class="error validationerror"
ng-show="myform.email.$invalid && myform.email.$touched">Must be a valid email</p>
<input type="password" name="password" placeholder="Password"ng-model="user.password" ng-required="true">
<p class="error validationerror"
ng-show="myform.password.$invalid && myform.email.$touched">Password is required</p>
</fieldset>
<button type="submit" class="btn"ng-disabled="myform.$invalid">Register</button>
<p>or <a href="#/login">login</a></p>
</form>
</section>
I’ve made a small alteration from the tutorial, combining the first and lastname fields using a tutorial here.